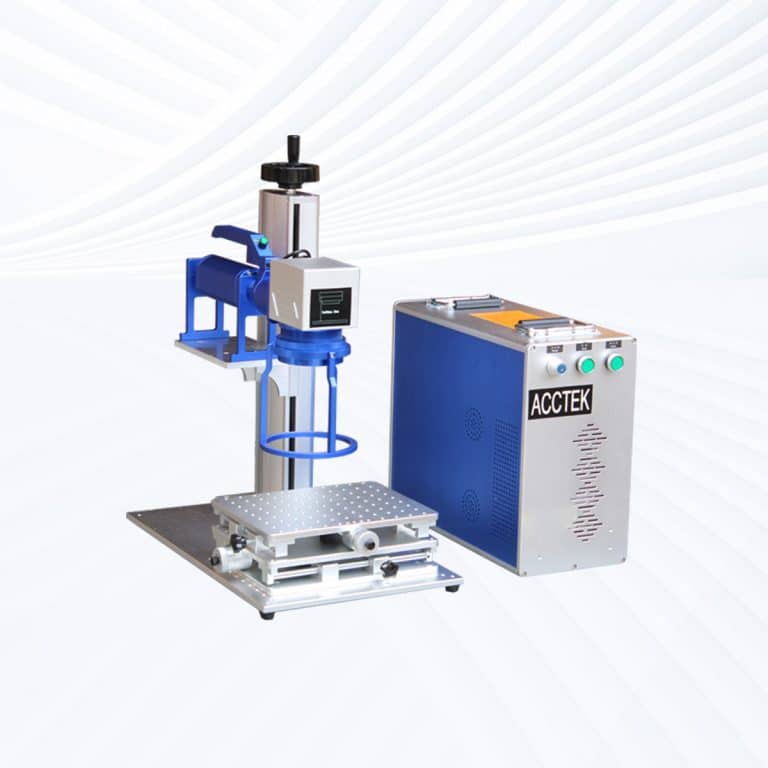
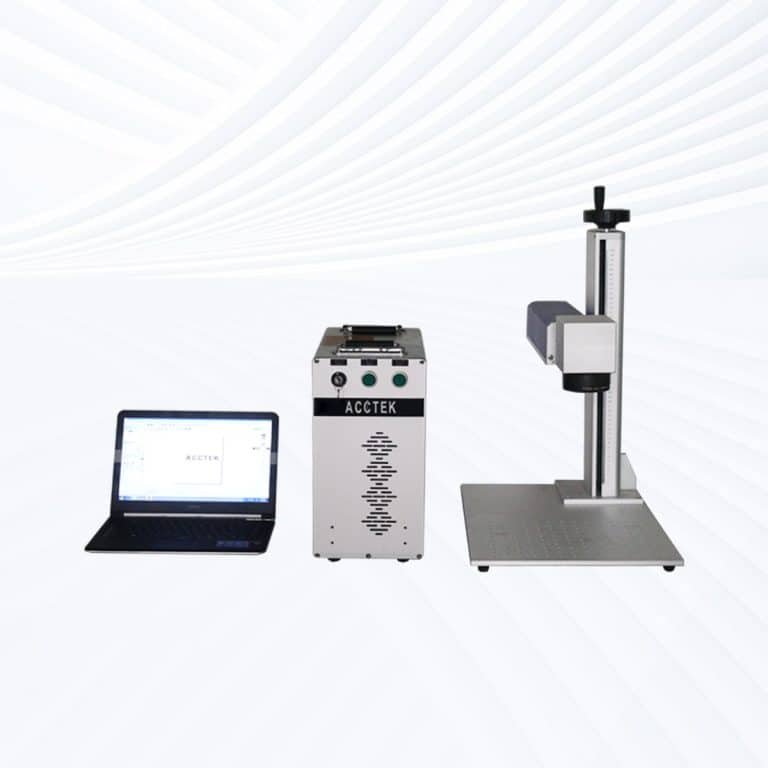
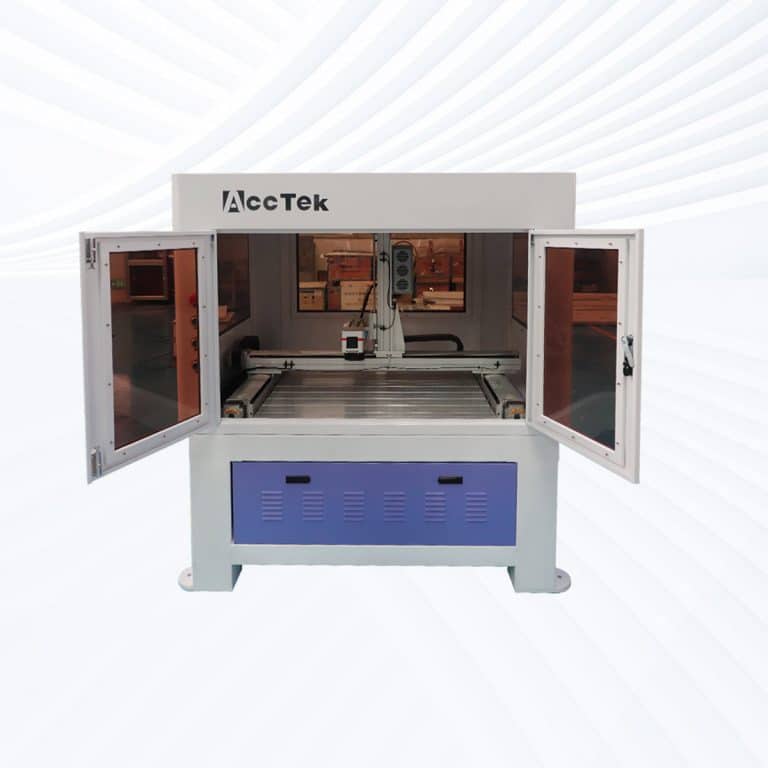
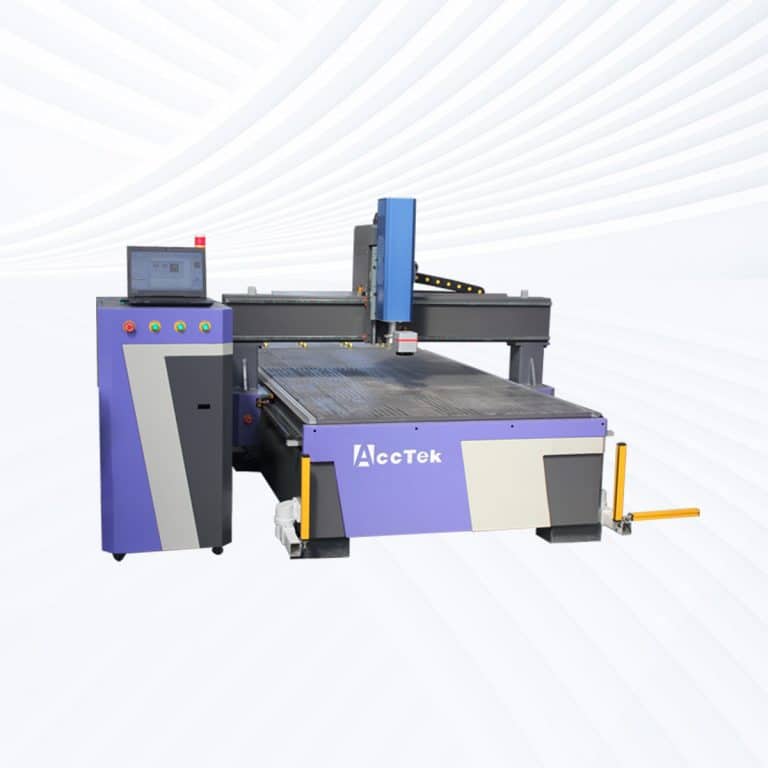
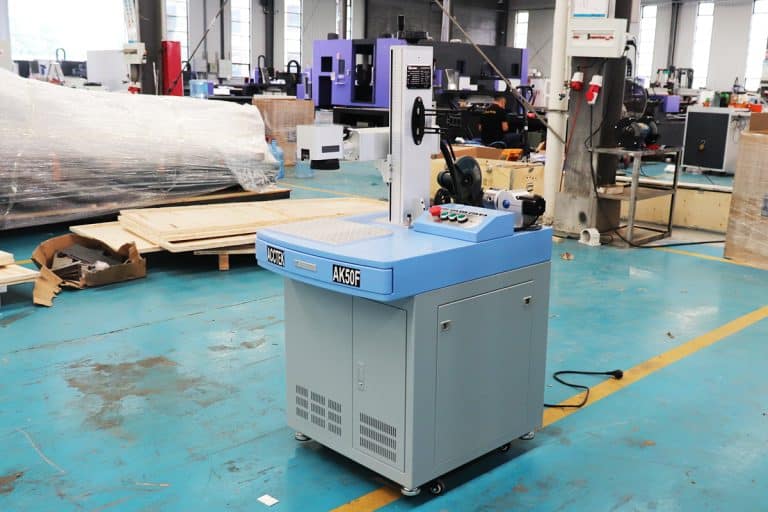
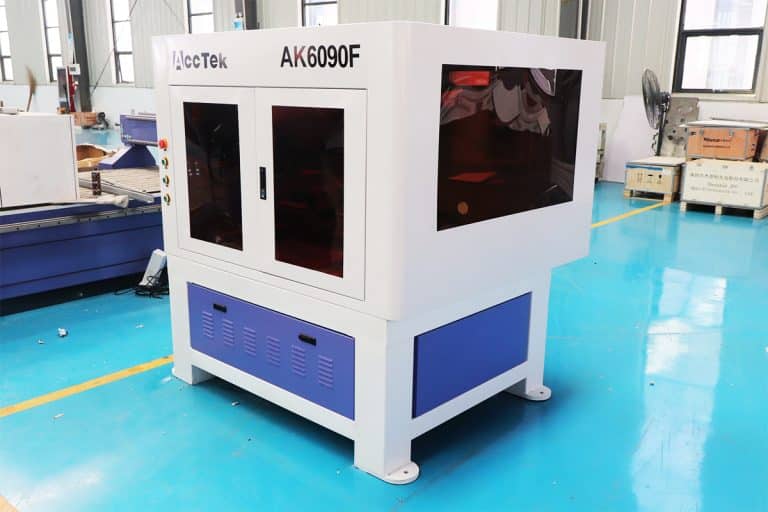
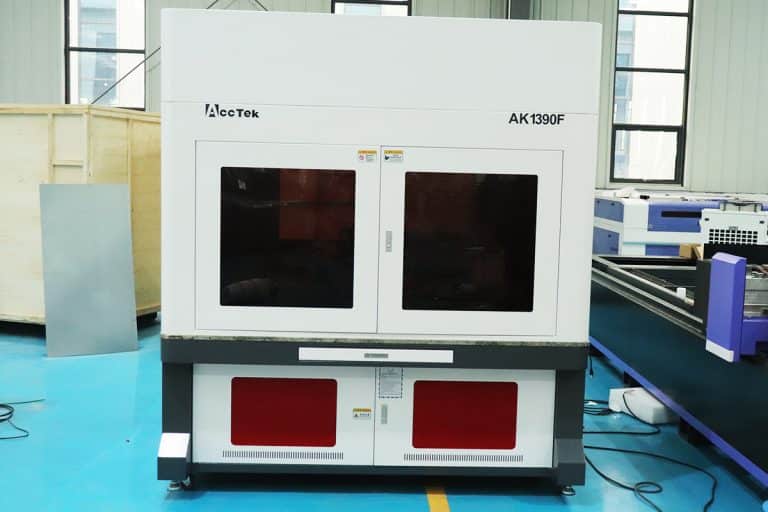
Product Introduction

Benefits of Laser Marking Glass
Permanent and High-Quality Marking
Laser marking creates permanent, scratch-resistant marks on glass surfaces. These marks are ideal for branding, traceability, or decoration and remain legible even in harsh environments, including exposure to heat, moisture, or chemical cleaning agents.
Non-Contact, Crack-Free Process
The laser marking process is completely non-contact, minimizing the risk of surface stress, cracks, or breakage. This makes it ideal for delicate or thin glass components that require precise marking without compromising structural integrity.
No Inks or Consumables
Laser marking uses only focused light, eliminating the need for inks, chemicals, or labels. This reduces long-term operating costs, eliminates waste, and provides an eco-friendly, maintenance-free marking solution with no recurring material expenses.
Compatible with Various Glass Types
Whether it's tempered glass, borosilicate, crystal, quartz, or coated glass, laser marking systems can be adjusted to mark nearly any glass type with consistent quality and control over depth, contrast, and texture.
High Precision and Fine Detail
Laser technology delivers sharp, detailed marks with high accuracy, even on small or curved surfaces. It's perfect for engraving logos, QR codes, serial numbers, or intricate decorative patterns with stunning visual clarity.
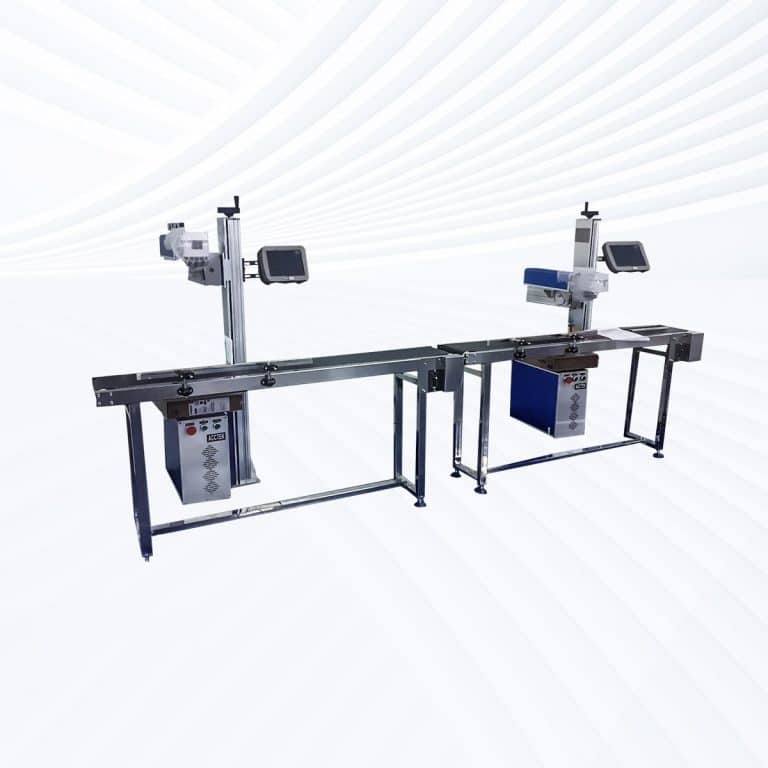
Fast and Scalable Production
Laser marking machines are built for speed and scalability. They can handle both high-volume production lines and custom one-off jobs, making them ideal for manufacturers, designers, and processors looking to boost efficiency and flexibility.
Compatible Glass Materials
- Soda-Lime Glass
- Borosilicate Glass
- Tempered Glass
- Annealed Glass
- Laminated Glass
- Float Glass
- Quartz Glass
- Fused Silica
- Lead Glass
- Colored Glass
- Tinted Glass
- Etched Glass
- Frosted Glass
- Mirror Glass
- Optical Glass
- Low-E Glass
- Glass Ceramic
- Alkaline Earth Glass
- Aluminosilicate Glass
- Display Glass
- Smart Glass
- Fire-Rated Glass
- Insulated Glass Units
- UV-Blocking Glass
- Anti-Reflective Glass
- Solar Glass
- Patterned Glass
- Anti-Glare Glass
- Art Glass
- Stained Glass
- Dichroic Glass
- Pressed Glass
- Rolled Glass
- Spandrel Glass
- Enamelled Glass
- High-Strength Glass
- Ultra-Clear Glass
- Optical Fiber Glass
- Pharmaceutical Vial Glass
- Scientific Instrument Glass
Application of Glass Laser Marking Machines


Customer Testimonials
Comparison VS Other Marking Technologies
| Feature | Laser Marking | Screen Printing | Pad Printing | Digital Printing |
|---|---|---|---|---|
| Marking Quality | High precision, fine detail, no smudging | Moderate quality, affected by surface texture | Good, but limited detail on glass | Good resolution, especially for color images |
| Durability | Permanent, scratch-resistant, fade-proof | Can wear off over time | Prone to chipping and fading | Susceptible to wear and UV damage |
| Material Compatibility | Works on nearly all types of glass | Limited to coated or flat glass | Works only on smooth, simple surfaces | Works best on pre-treated or coated glass |
| Surface Contact | Non-contact, zero surface pressure | Requires contact | Requires contact | Minimal contact |
| Risk of Cracking/Chipping | Very low – safe for fragile glass | Moderate, especially on thin glass | High – pressure can cause damage | Low risk with proper handling |
| Setup Time | Minimal – digital file-based | High – screen creation required | High – pad and tooling setup needed | Moderate setup |
| Customization Flexibility | Very high – instant design changes | Low – new screens needed for each design | Limited – pads must be swapped | High – digital files easily changed |
| Environmental Impact | Eco-friendly – no ink or waste | Uses inks, solvents, and screens | High – uses pads, solvents, and chemicals | Moderate – ink waste and cleaning involved |
| Cost per Mark (Long-Term) | Low – no consumables or recurring material cost | Medium – ongoing ink and screen costs | High – regular pad and ink replacement | Medium – ongoing ink and maintenance costs |
| Maintenance Requirements | Very low – minimal upkeep | High – frequent cleaning and screen upkeep | Moderate to high – pad wear and cleaning | Moderate – printhead maintenance needed |
| Marking Depth | Shallow etching or frosted finish possible | Surface-level only | Surface-level only | Surface-level only |
| Automation Integration | Easy to integrate with production lines | Difficult to automate | Moderate automation capability | Moderately easy to automate |
| Repeatability | Excellent – consistent results across batches | Inconsistent with manual handling | Can vary depending on pad condition | Consistent with stable setup |
| Production Speed | High-speed marking with no drying time | Slower due to prep and curing | Moderate – requires pad cycles | Fast for small runs, slower for mass output |
| Versatility on Shapes | Excellent – works on flat, curved, and textured glass | Limited to flat surfaces | Moderate – pads can conform to shapes | Best on flat surfaces |
Why Choose Us
High Precision
Our machines deliver sharp, detailed markings with excellent contrast, suitable for complex patterns and small components across metal, plastic, and other materials.
Fast Processing
Designed for speed and efficiency, our systems complete marking tasks quickly without compromising quality, making them ideal for high-volume production environments.
Low Maintenance
With durable components and minimal consumables, our machines offer stable long-term performance, reducing downtime and keeping operating costs low.
Flexible Solutions
We provide a variety of models and customization options to suit different materials, marking needs, and production setups, ensuring the right fit for your business.
Related Resources

What Are The Design Limitations Of Laser Marking
This article explores the key design limitations of laser marking, including material compatibility, resolution, durability, cost, and integration challenges, with insights on optimizing performance in real-world applications.
What Is The Cost Of Laser Marking Machines
This article explores what determines the cost of laser marking machines, including laser type, power, automation, accessories, hidden expenses, and total cost of ownership factors.
Can Lasers Be Used For Marking On Curved or Irregular Surfaces
This article explores the advantages and disadvantages of laser marking, including how it works, key technologies, applications, costs, and factors that determine when it is the right marking solution.
What Types of Laser Marking Machines Are There
This article explains the main types of laser marking machines, covering laser sources, marking methods, materials, applications, and how to choose the right system for production needs.
Frequently Asked Questions
How Much Do Glass Laser Marking Machines Cost?
- CO2 Laser Marking Machines: CO2 lasers are commonly used for glass marking because their 10.6 µm wavelength is well-absorbed by the glass surface, allowing for decorative or functional etching without cutting through the material.
- Entry-Level Systems ($3,500–$7,000): These desktop models are ideal for small workshops or hobbyists. They can mark flat glass surfaces, bottles, or panels, but may offer limited precision and speed.
- Mid-Range Systems ($7,000–$15,000): Offer better optics, faster engraving speeds, and more consistent results. These systems are used in small-scale commercial applications such as awards, signage, and glassware.
- High-End Systems ($15,000–$25,000): Include larger bed sizes, higher wattage, better cooling, and automation options (like rotary attachments for curved glass). These machines are common in production environments that need high throughput and reliability.
- UV Laser Marking Machines: UV lasers are ideal for ultra-fine, high-contrast marking on glass. Their 355 nm wavelength causes a “cold marking” effect, minimizing cracks or chips—perfect for logos, serial numbers, or electronics components.
- Compact UV Systems ($4,500–$8,000): Entry-level DPSS (diode-pumped solid-state) systems with moderate marking speeds. Suitable for precise but low-volume jobs like barcodes or component labeling.
- Production-Grade UV Systems ($8,000–$15,000): Deliver faster processing, deeper focus fields, and more stable marking on curved or uneven glass. Ideal for cosmetics packaging, smartphones, or labware.
- Advanced UV Markers ($15,000–$20,000): High-speed galvo systems with integrated vision alignment, auto-focus, or robotic integration. Used in advanced manufacturing and medical applications where marking must be flawless.
Which Laser Marking Machine is Best for Marking Glass?
- Strengths:
- Effective Surface Engraving: CO2 lasers can engrave clear, frosted patterns on the surface of glass. They are widely used for branding, barcoding, and decorative etching on bottles, mirrors, windows, and flat glass.
- Non-Contact Process: This minimizes mechanical stress, reducing the risk of cracking during marking.
- Limitations:
- Thermal Stress Risk: The heat from the laser can cause microfractures or stress marks if not properly controlled.
- Not Suitable for Deep Engraving: CO2 lasers don’t penetrate glass well and are limited to surface-level marking.
- Requires Coating for Dark Marks: For visible contrast (like black marks), a coating or additive layer is sometimes needed before engraving.
- Best Use Cases:
- Decorative etching
- Serial numbers or logos on bottles or windows
- High-volume, low-contrast applications
- Strengths:
- High Precision & Detail: UV lasers can create fine, sharp, high-resolution marks without cracking or chipping the glass.
- Minimal Thermal Damage: The low-energy, short-pulse laser causes photochemical reactions rather than thermal burns—ideal for brittle materials.
- Permanent, High-Contrast Marks: UV lasers produce clean, frosted, or white marks without requiring coatings or post-processing.
- Limitations:
- Slower Than CO2: UV marking tends to be slower, especially on large areas.
- Higher Cost: UV lasers are typically more expensive and require more maintenance than CO2 laser marking machines.
- Best Use Cases:
- QR codes, serial numbers, and barcodes on glass surfaces
- Touchscreens, pharmaceutical packaging, labware
- Any application demanding ultra-fine, high-contrast marking
What are The Disadvantages of Laser Marking Glass?
- Cracking and Fragility
- CO2 Lasers: While CO2 lasers are effective at marking most glass types, the heat generated can cause thermal stress. This can lead to cracking, especially with thin or brittle glass. The temperature difference between the marked area and the surrounding material can result in unwanted fractures.
- UV Lasers: UV lasers, being more precise and producing less heat, help reduce thermal stress. However, UV lasers can still cause micro-cracks if not carefully controlled, particularly on toughened or tempered glass.
- Limited Depth of Marking
- Both CO2 and UV lasers are generally used for surface marking. While they can create permanent, high-contrast marks, they are not typically capable of engraving deep marks. If deep engravings are required, additional equipment or different laser types (like fiber lasers) might be necessary.
- Fumes and Debris
- CO2 Lasers: When marking glass, CO2 lasers can generate fumes and small glass debris, especially when marking at high powers. These particles can interfere with the laser’s focus and reduce the quality of the marking if not adequately removed.
- UV Lasers: UV lasers also produce some level of debris and fumes, though they tend to be less than those from CO2 lasers. Still, proper ventilation is necessary to maintain a clean environment and prevent contamination.
- Material Compatibility
- CO2 Lasers: CO2 lasers work best on non-metals like glass, but they may struggle with highly reflective surfaces like polished glass. The reflection of the laser beam can cause a loss of energy and result in poor or inconsistent marking.
- UV Lasers: UV lasers offer better precision on materials like glass, but some glass types, particularly those that are chemically treated or coated, might react poorly to UV laser marking. Special care is needed to choose the correct settings to avoid surface damage.
- High Costs of Equipment
- UV Lasers: UV lasers tend to be more expensive compared to CO2 lasers. This makes the initial investment for UV laser marking equipment relatively higher. Additionally, UV lasers may require more frequent maintenance due to their complexity.
- CO2 Lasers: While typically more affordable than UV lasers, CO2 lasers can still be expensive for high-powered systems used for large-scale glass marking. Moreover, specialized lenses and optics might be required, which further increases the cost.
- Slow Marking Speed
- Both CO2 and UV lasers can be slower compared to other types of lasers (like fiber lasers) when marking glass, particularly for larger areas. This is especially noticeable when working with detailed designs or deep marking, where the speed can be reduced to ensure precision.
- High Energy Consumption
- Both CO2 and UV lasers tend to consume more energy compared to other laser types, such as fiber lasers. This can increase operational costs, especially when used in high-production environments.
- Risk of Surface Damage
- If the laser settings are not optimized, both types of lasers can cause surface damage, such as discoloration, pitting, or weakening the structure of the glass. Careful calibration is required to avoid such outcomes, especially with thin or delicate glass materials.
How Should I Choose Glass Laser Marking Machines?
- Type of Glass
- If you are marking delicate or thin-walled glass, a UV laser is usually the best option to avoid heat damage.
- For thicker or more robust glass (e.g., tumblers, large glass panels), CO2 lasers can provide effective surface engraving without as much risk of thermal distortion.
- Precision Needs
- For intricate and detailed engravings (e.g., fine text, logos, and artwork), UV lasers are superior due to their higher precision.
- If the design is less intricate and more focused on simple text or general surface marking, CO2 lasers may be sufficient and more cost-effective.
- Production Volume
- CO2 lasers tend to be more cost-effective in terms of both initial investment and maintenance, making them ideal for larger production runs or less detailed work.
- UV lasers, though more expensive, provide a higher quality finish and are better for small, high-end batches where detail and precision matter more than throughput.
- Material Handling
- CO2 lasers are more versatile across various materials, so if your operation involves marking more than just glass, the flexibility of a CO2 laser could be valuable.
- UV lasers are primarily suited for high-precision marking of glass and are less effective on other materials.
- Budget
- CO2 lasers are typically more affordable, both in terms of purchase price and maintenance.
- UV lasers, while offering superior quality, come with a higher price tag, both initially and in maintenance costs.
What are the Risks of Laser Marking Glass?
- Thermal Stress and Cracking
- Risk: Glass is sensitive to thermal shock, and the heat generated by laser marking can cause stress on the material, leading to cracks or breakage.
- Cause: The concentrated heat from the laser can create localized areas of extreme temperature variation, causing the glass to expand unevenly, which can result in cracking or shattering, particularly on thinner glass.
- Mitigation: Use lower power settings and adjust the speed of the marking process. Ensuring proper cooling or pre-cooling of the glass before marking can also reduce the risk of thermal shock.
- Uneven Marking and Surface Damage
- Risk: If the laser is not properly calibrated, it may produce uneven or inconsistent markings, which can damage the glass surface, leaving unwanted imperfections or distortion.
- Cause: Variations in the laser’s focus, speed, or power can lead to inconsistent engraving depths or excessive heat accumulation in certain areas.
- Mitigation: Regular maintenance of the laser, proper focus adjustment, and choosing the right laser parameters for the type of glass being marked are key to avoiding this issue.
- Laser Reflections and Eye Safety
- Risk: The high-intensity light produced by lasers, especially CO2 lasers, can be harmful to the eyes. Additionally, certain glass types can reflect laser light, which can be hazardous to operators.
- Cause: Some glass types, particularly reflective or mirrored glass, can reflect the laser beam, potentially causing injury if operators are not protected.
- Mitigation: Always ensure the marking process takes place in an enclosed system with proper safety features, such as protective glass and shields. Operators should always wear appropriate laser safety goggles and follow safety guidelines.
- Fumes and Smoke
- Risk: Laser marking produces fumes and smoke, particularly when marking coatings or when using certain types of glass that contain additives. Inhaling these fumes can be harmful.
- Cause: The high temperatures of the laser can cause coatings on glass or other materials (e.g., inks, paints) to vaporize, creating potentially toxic fumes. If glass is being marked in a poorly ventilated area, smoke build-up can also damage equipment.
- Mitigation: Use a fume extraction system to properly capture and filter the fumes. Adequate ventilation is essential to protect both operators and machinery.
- Overheating of the Glass
- Risk: Excessive heat from the laser can lead to overheating of the glass, causing warping or a reduction in clarity. This is particularly a risk when marking delicate or thin glass pieces.
- Cause: Overheating can occur if the laser power or marking speed is not properly optimized for the thickness and type of glass.
- Mitigation: Adjust the laser settings (power, speed, and focus) based on the type of glass being marked. Pre-cooling the glass before marking and using air assist to cool the area while marking can also help mitigate overheating risks.
- Contamination of the Marked Area
- Risk: The laser marking process can cause residue or small particles to accumulate on the surface of the glass, potentially affecting the clarity and quality of the final product.
- Cause: As the laser interacts with the glass, it can cause surface materials to vaporize and leave residue behind, which can dull or mar the appearance of the marking.
- Mitigation: Regular cleaning of both the glass and laser system helps prevent residue buildup. Additionally, use a proper laser cleaning technique after marking to ensure a clear, polished finish.
- Laser Source Wear and Tear
- Risk: Continuous use of a laser marking system can lead to wear and tear of the laser source (e.g., CO2 or UV laser tubes), which may result in decreased marking quality or machine downtime.
- Cause: Lasers are consumable parts, and with time, their efficiency declines, which can impact the consistency and quality of the marks.
- Mitigation: Regular maintenance, proper calibration, and occasional replacement of the laser source can help maintain optimal performance.
- Inconsistent Marking on Different Glass Types
- Risk: Not all types of glass react the same to laser marking. Some types may not mark well, while others may be prone to damage or inconsistent results.
- Cause: Different glass compositions (e.g., tempered glass vs. non-tempered glass, coated vs. non-coated) have varied reactions to the laser, making it challenging to get consistent results.
- Mitigation: Test the laser on a sample of each glass type before starting production. Adjust settings accordingly to achieve the best results and minimize the risks of damage.
How Should I Maintain Glass Laser Marking Machines?
- Regular Cleaning
- Laser Lens and Mirrors: Clean the laser lens and mirrors regularly to remove dust, debris, and any residues that might affect the quality of the marking. Use appropriate cleaning materials such as lint-free wipes and laser-safe cleaning solutions. Gently clean the lens and mirrors, avoiding scratching them.
- Machine Exterior: Keep the machine’s exterior clean to ensure smooth operation. Dust and dirt buildup can hinder cooling systems, vents, and other crucial components. A clean exterior also prevents contamination from affecting the glass being marked.
- Laser Path Area: Periodically clean the area around the laser path where fumes, smoke, or residue may accumulate. Any buildup in this area can obstruct the laser beam and lead to inconsistent markings or machine malfunctions.
- Check and Clean the Cooling System
- Water Cooling (if applicable): For laser machines with water cooling systems, regularly check the water tank to ensure it is clean and filled with the proper coolant. Contaminated or insufficient coolant can cause the machine to overheat, leading to reduced performance and potential damage.
- Air Assist System: If your machine uses air assist to help cool the area during marking, clean the air filters and check for any clogs in the air lines. Ensure that the airflow is consistent and that the air compressor is functioning correctly.
- Cooling Fans: Ensure all cooling fans are free from dust and debris. Blocked fans can lead to overheating, which can damage the laser and other components. Clean the fans regularly using compressed air or a soft brush.
- Inspect and Replace the Laser Source
- Check the Laser Tube: The laser tube, whether it’s a CO2 or UV tube, is a critical component. Over time, the laser tube will lose efficiency and may need to be replaced. Inspect the tube regularly for signs of wear, such as discoloration or cracks. If the power output decreases, it may be time to replace it.
- Monitor Laser Power: Keep track of the power output of your laser. Most modern systems have software that can help you monitor this. If the laser power starts dropping significantly, you may need to adjust your settings or replace the tube.
- Check for Leaks (in gas-powered lasers): For CO2 lasers that use gas-filled tubes, inspect the tube for any signs of leakage. A gas leak will reduce the laser’s efficiency and can lead to malfunctioning.
- Calibration and Alignment
- Check the Focus: Regularly verify that the laser beam is correctly focused. Incorrect focus can result in poor quality markings, as the laser won’t hit the surface with the intended precision. Adjust the focal length as needed.
- Align the Laser: Misalignment of the laser can affect marking accuracy and quality. Perform regular alignment checks to ensure that the laser is properly aligned with the marking area.
- Optical Path Alignment: For machines with more complex optical systems, ensure that all mirrors and lenses are aligned correctly to avoid energy loss and maximize efficiency.
- Monitor and Maintain Software
- Software Updates: Keep the machine’s control software up to date. Software updates often contain bug fixes, performance improvements, and new features that can enhance the machine’s functionality.
- Back-Up Settings: Regularly back up machine settings, including power levels, speed settings, and calibration configurations. This ensures you can easily restore optimal settings if something goes wrong.
- Check the Power Supply
- Ensure Stable Power Supply: A stable power supply is essential for proper laser function. Fluctuations in voltage or power surges can damage the laser or cause inconsistent markings. Use a surge protector or an uninterruptible power supply (UPS) to safeguard your machine from electrical issues.
- Inspect Cables and Connections: Regularly inspect cables and connections for signs of wear, corrosion, or fraying. Loose or damaged cables can disrupt power delivery, leading to inconsistent performance.
- Maintain the Motion and Control Systems
- Inspect Rails and Bearings: Check the rails, guideways, and bearings for smooth movement. Lubricate these parts as needed to avoid wear and ensure that the marking head moves accurately and consistently.
- Check for Loose Components: Periodically check for loose screws, bolts, or connectors in the motion system. Loose components can lead to misalignment and erratic movement, which can affect marking quality.
- Lubrication: Apply the recommended lubricants to any moving parts to reduce friction and wear. Be careful to use only the type of lubricant specified by the manufacturer to avoid contamination or damage.
- Monitor and Replace Consumables
- Lens and Mirror Replacement: Over time, the laser lens and mirrors can become worn out due to constant exposure to the laser. If you notice any loss of power, discoloration, or damage, replace these components.
- Protective Glass or Windows: Most laser machines have protective glass or windows to shield the internal optics from debris and contaminants. Clean and replace these protective elements regularly to maintain optimal laser performance.
- Air Filters (for air assist systems): Replace air filters periodically to ensure the air assist system functions properly, especially if the machine is operating in a dusty environment.
- Ensure Proper Ventilation
- Fume Extraction: Glass laser marking can create smoke and fumes, which should be captured by an effective fume extraction system. Ensure the system is operating properly and replace filters as needed to maintain airflow and protect the operator from harmful fumes.
- Ventilation: Ensure the workspace is well-ventilated to avoid any buildup of fumes or smoke that could damage the machine or impair visibility.
- Regular Inspections and Preventive Maintenance
- Scheduled Inspections: Implement a regular inspection schedule to check for any signs of wear or damage. Even if the machine is functioning well, preventive checks can help catch issues before they become serious problems.
- Service Contracts: Consider a service contract with the manufacturer or a third-party service provider for periodic maintenance checks. A professional technician can perform deep inspections and recalibrations to keep your machine in top shape.
What Training is Required to Operate Glass Laser Marking Machines?
- Safety Protocols
- Laser Safety: Understanding the potential hazards associated with laser equipment, including the risks of eye damage and skin exposure. Operators should learn to use protective eyewear and adhere to proper safety protocols.
- Emergency Procedures: Training on how to handle emergencies such as fire hazards, system malfunctions, or electrical issues.
- Ventilation Systems: Knowledge of how to operate ventilation systems to manage fumes and debris generated during the laser marking process.
- Machine Operation
- Laser Parameters Setup: Operators must be trained to set and adjust laser parameters like power, speed, frequency, and focus, depending on the material and desired effect.
- Material Handling: Understanding how to load and position glass materials correctly to avoid damage and ensure precise marking.
- Control Software: Familiarity with the software used to control the machine, including how to design, upload, and optimize laser marking files for glass.
- Maintenance and Troubleshooting
- Routine Maintenance: Training on daily, weekly, and monthly maintenance tasks, such as cleaning lenses, inspecting mirrors, and checking cooling systems.
- Troubleshooting: Operators need to recognize common issues, such as poor marking quality or system errors, and know how to troubleshoot or report these problems effectively.
- Quality Control
- Marking Quality Standards: Training to evaluate the quality of the laser marking on glass and adjust parameters as needed to achieve desired results.
- Testing and Calibration: Learning how to calibrate the machine to ensure consistent and accurate results over time.
- Compliance and Documentation
- Regulatory Compliance: Familiarity with any industry-specific regulations related to laser equipment operation, including environmental and workplace safety standards.
- Documentation: Operators may need to log machine usage, maintenance, and safety checks for compliance or internal tracking purposes.
What Are the Environmental Requirements for Using Glass Laser Marking Machines?
- Stable Temperature and Humidity Control: Glass marking lasers perform best in environments with controlled temperature and humidity. Ideal room temperature ranges from 18℃ to 25℃ (64℉ to 77℉), with relative humidity kept between 40% and 60%. Excessive heat or humidity can affect the laser beam path, compromise the electronics, or lead to condensation on optical components, which can cause beam distortion or damage.
- Ventilation and Fume Extraction: Even though glass itself doesn’t burn, marking it can generate fine particulates, micro-glass dust, and vaporized coating materials (e.g., if marking treated or painted glass). Proper exhaust systems and fume extractors are essential to remove these byproducts and maintain air quality. Enclosures with built-in filtration are common in professional setups.
- Dust-Free, Clean Environment: Laser optics are extremely sensitive to dust and airborne contaminants, which can scatter the beam or degrade marking quality. A clean, dust-controlled workspace is necessary to preserve the clarity and accuracy of glass marking. HEPA filters or positive air pressure environments may be used in precision marking applications.
- Stable Surface and Vibration Control: Laser marking glass demands high precision, especially when dealing with intricate designs or small font sizes. Machines must be placed on stable, vibration-free surfaces. External vibrations from nearby machinery or foot traffic can affect beam alignment and marking resolution.
- Lighting and Visibility: While not a direct operational requirement, good ambient lighting helps operators monitor marking progress and spot alignment or positioning issues. Laser safety windows or shields should be used to prevent exposure to laser light during operation.
- Electrical Supply Stability: Consistent electrical power is critical for high-precision laser systems. A dedicated power line with voltage regulation or a UPS (uninterruptible power supply) may be used to prevent downtime or damage from surges or outages.
- Laser Safety and Shielding: Glass laser marking systems should be installed in areas that follow laser safety protocols, including proper shielding, Class 1 enclosures, or restricted access zones for Class 3B or 4 lasers. Warning signs, interlock systems, and personal protective equipment (PPE) such as laser safety glasses are often required.
- Air Assist or Cooling Systems (if applicable): Some glass marking setups, particularly high-power or continuous-use machines, may require active cooling systems (e.g., water chillers or fans) to keep internal components from overheating. In some cases, air assist is used to direct heat away from the marking area and maintain clarity.